You can change the color and style of the font under the Format Menu in MS Word 2003. You can apply the border and background to the page. The object on the page can create a design.
Font: Format Menu in MS Word 2003
You can change the font style of the text selected by Format Menu in MS Word 2003. You can bring lines up, and down, between texts. Try using the options present in it, the effect of each one will be shown in this dialog box. By clicking on the tab button of character spacing in the same dialog box, the dialog box will change as follows. By the option present in it, you can set the space between words, etc.
Click on the tab button of the text effect in the same dialog box will change the dialog box as follows. By the option present in it, you can put different effects like flicker in the selected text.
Note: This effect is related to viewing only. It has nothing to do with print.
Paragraph:
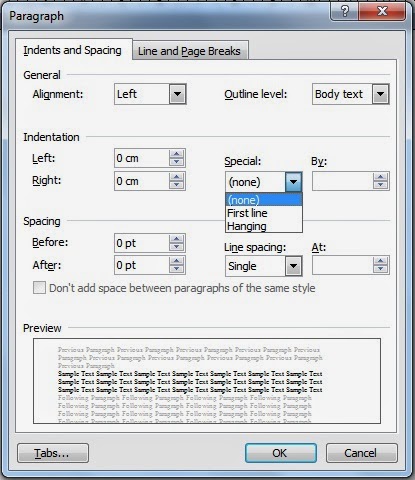
In the Format Menu in MS Word 2003, we do the setting of the paragraph through the Paragraph option. You can use At Least, Exactly, and many more options in the Paragraph dialog box to customize your line spacing. If you select one of these options. So you have to use the At: box to further define your selection.
Note: This can be said in the language of computers. Wherever you press enter, it will bring up the paragraph.
Alignment:
Through the option Format Menu in MS Word 2003 present in this drop-down list, we do this to center the text from right to left or to spread the line properly.
- Left: In this spin box, we fix how far the paragraph should be from the left side of the page.
- Right: In this spin box, we fix how far the paragraph should be from the right side of the page.
- Special: By selecting the first line in this list box, the first line of the paragraph will be inwards from the paragraph.
By selecting Heading, the first line of the paragraph will move away from the paragraph. Now after selecting both of these options, the line will move inwards or outwards according to the number you give in the spin box of By.
Before let’s fix this in this spin box. What is the distance before the paragraph? After fixing this in this spin box. What is the distance after that paragraph? Line Spacing decides the distance between the lines by the option present in this list box. And by giving a number in the spin box you can increase or decrease the distance between the lines as desired.
Note: Whichever of the above-mentioned options will be used, its effect will be shown in this dialog box.
Bullets and Numbering:
Select the type of bullet or number you want and click OK. The Bullets and Numbering dialog box also gives you many options. By clicking on the outline number, you can see the template for outlining. The List Styles tab allows you to create your list style using the same alignment, bullet, and character.
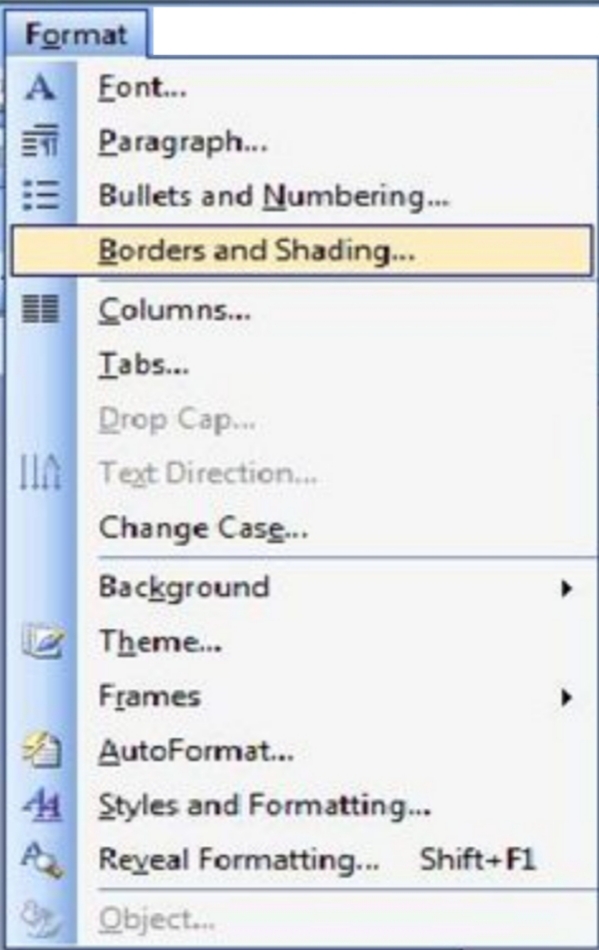
Border and Shading:
Through this, you can make the paragraph and page beautiful by giving borders shading, etc. in the paragraph and page.

Columns: Format Menu in MS Word 2003
The Format Menu In MS Word 2003, through Column, you can divide the page into columns as per your wish.
- Number of columns: The page will be divided into as many columns as you give in this spin box. Or click on the type you want from the column shown above.
- Line between: By turning on this check box, you can bring lines between columns.
- Width: In this spin box give the number for the width of the column.
- Equal column width: By turning on this check box, the width of all the columns can be divided equally.
- Apply to: By selecting the whole document from this drop-down list, you can divide the page into columns. Selecting this point forward can further divide the entire document into columns where the cursor is. Similarly, if you want to divide only the selected paragraph into columns, then select the selected text.
Note: This option will come only after selecting the paragraph or else it will not.
Tab: Format Menu in MS Word 2003
The Format Menu in MS Word 2003, set the distance of the tab button through the Tab option. Fix the distance in the tab stop position box. Like -1″,2″ etc. Then click on Set and OK. Now on pressing the Tab button, the cursor will reach the same distance.
By selecting the Left tab, Right tab, Center tab, Decimal tab, Bar tab, etc. writing after the given tab will show the article in the same way. Press Ctrl+tab to assign a tab. Selecting 2,3,4 under the leader will result in a similar line when you press Tab.
Drop Cap:
By this, only the first letter of the paragraph can be increased as much as the line.
- Font: From this drop-down list, you can change the font of the first letter of the paragraph.
- Line to Drop: In this box, enter as many numbers as the first letter of the paragraph is to be capitalized on the line.
- Distance from the text: In this box, fix how far the first letter of the paragraph should be in the line.
Text Direction:
Through this option, you can change the direction of the text written inside the text box. You can rotate right, left, up, and down wherever you want.
Change Case:
Format Menu in MS Word 2003 with this option, the select text can be changed to capital letters or small letters first big and small. On clicking this option, a dialog box will open which has the following options.
- Sentence case: By clicking on this radio button, the first letter of the sentence will be capitalized.
- lower case: By clicking on this radio button, all the letters of the sentence will be shortened.
- UPPER CASE: By clicking on this radio button all the letters of the sentence will be capitalized.
- Title Case: By clicking on this radio button, the first letter of every word will be capitalized.
- toOGGLE cASE: By clicking on this radio button the first letter of the sentence will be shortened.
Background: Format Menu in MS Word 2003
Format Menu in MS Word 2003 through this, you can add colors, different designs, wallpapers, etc. to the background of your page. There are two options under this.
- Fill Effect: Through this, you can take design colors in different styles in the background of the page. On clicking this, a dialog box will open in which click on the tab button of gradient, texture, pattern, and picture present. You can bring the design present in it in the background.
- Printed Watermark: This option is used to bring a watermark in the background. On clicking this, the following dialog box will open. No watermark Selecting this radio button will not cause a watermark in the background.
- Picture watermark: After selecting this radio button, clicking on the push button of the selected picture can bring the watermark picture in the background as a logo.
Scale selects the size of the watermark picture from its drop-down list. Washout By turning on its check box, the watermark picture will appear in light color. Through Text Watermark, you can bring a watermark as text. Click on it, and all the options below will be active.
Theme:
Through this, you can bring the designs made in the Format Menu in MS Word 2003 document. It is such a set of unified design elements and color schemes. Which helps in preparing professional and designed documents. Due to this the document is easy to View in MS Word, e-mail, and on the web.
Frame:
This option is used to easily access the information and show the contents of the website. Which is to prepare for the website by making a frame in the page and designing it for a separate web page. It is used to create headers and tables on the website.
Auto format:
Through this option, you can eliminate the changes made in the article by color size, etc. And if you want to keep the rest, you can keep it.
Method: On clicking this, the dialog box will open. Where OK will open another dialog box.
- Review change: By clicking on it another dialog box will open. Which by selecting any paragraph of the article by the fund, the changes made in it can be eliminated by the rejection. And can keep the rest of the changes made by Accept.
- Style Gallery: With this, you can change your article in a ready-made style.
Method: If this ready-made style is loaded with the MS Office program then you can bring the style in your article.
Style and Formatting:
This option is used especially while writing the book, setting the heading and paragraph to create the style as per your wish. Apart from this, if you want to change the style made, you can do it. And if you want to prepare a shortcut key for these styles, you can. So that the setting of style created by the shortcut can be easily brought in the heading and paragraph. On clicking on it, the task pane changes in the form of Style and Formatting.
Method: Click on this Task pane new style button The following dialog box will open. In which follow the method given below.
- Name: Write any name in this box. Like- Heading after this.
- Based on: From this drop-down list, make a selection as to what should be the basis of your heading. And if you do not want then select Normal.
- Style for the following paragraph: Now you drop down the list and select this option. When you write a paragraph after pressing the Enter button, in which style the paragraph should come. And if you don’t want to. So select Normal.
- Format: By clicking on this button, the option bar will come up. In this, by clicking on the font, select the size of the heading, font style, color, underline, etc. OK.
Then later in the same bar by clicking on the paragraph under the font, select one of the justified center right left, etc. from the place of alignment. Then by selecting the first line from the drop-down list of special, fix that at what distance the first line of the paragraph should come.
Apart from this, the distance of the paragraph from right to left should be on both sides of the page. And what is the distance between the lines? If you want to select this also, you can do it. After this, the box will open as soon as you do OK, leaking on the shortcut key button will open another dialog box. Press any button with Ctrl in the box of press now shortcut key.
For example, Ctrl+H, then click on assign, click on close, then apply by clicking on ok. In this way, you want to create as much style for the heading and paragraph. can make.
Note: Generally, the size of the heading is kept larger than the size of the paragraph. And select anyone from the Center, Right, or Left. And the shortcut key is generally fixed by Ctrl+h. Keep the size of the paragraph less than the size of the heading. And by selecting justified, keep the first line at 0.3 inch distance. The shortcut key is generally fixed by Ctrl+p. In this way, you will have to create two styles, one for the heading and the other for the paragraph. Which one to bring? Press its shortcut key. and start writing.
Reveal Formatting:
This option is used to see and change the formatting in the text. By clicking on it, the task will show all the formatting done in the text in the pane.
Like– font, language, alignment, paragraph, etc. Now if you want to change any of these. So by clicking on the blue link text in the task pane shown below, you can make changes in the related dialog box. Turning on the Distinguish style source check box will change all those paragraphs at once. Which you have written in the same style. By turning on the show all formatting marks check box, you can show the symbol of the tab, space, and paragraph.
Object:
Crop a picture brought by the Object Option in the Format Menu in MS Word 2003. You can change its color like black and white dark or light.
Conclusion:
Mastering the Format Menu in MS Word 2003 provides users with a wide array of tools to enhance document appearance and layout. From font styling to paragraph formatting, and from columns to background effects, the Format Menu empowers users to create visually appealing and well-structured documents. Understanding the various options under Font, Paragraph, Bullets and Numbering, Borders and Shading, Columns, Tabs, and more allows for precise control over document design. The inclusion of features like Drop Cap, Watermark, and Auto Format further demonstrates the versatility of Format Menu in MS Word 2003 in meeting diverse formatting needs.
FAQ
Q: How do I change the font style using the Format Menu in MS Word 2003?
To change font style, select the text, go to the Format Menu in MS Word 2003, choose Font, and explore options such as style, size, and effects.
Q: Can I add the background color or a watermark to my document with the Format Menu in MS Word 2003?
Yes, you can. Use the Background option to add colors, designs, or even watermarks to the background of your page.
Q: How do I create columns in MS Word 2003 using the Format Menu?
Navigate to the Format Menu in MS Word 2003, select Columns, and set the number of columns, width, and other preferences in the dialog box.